
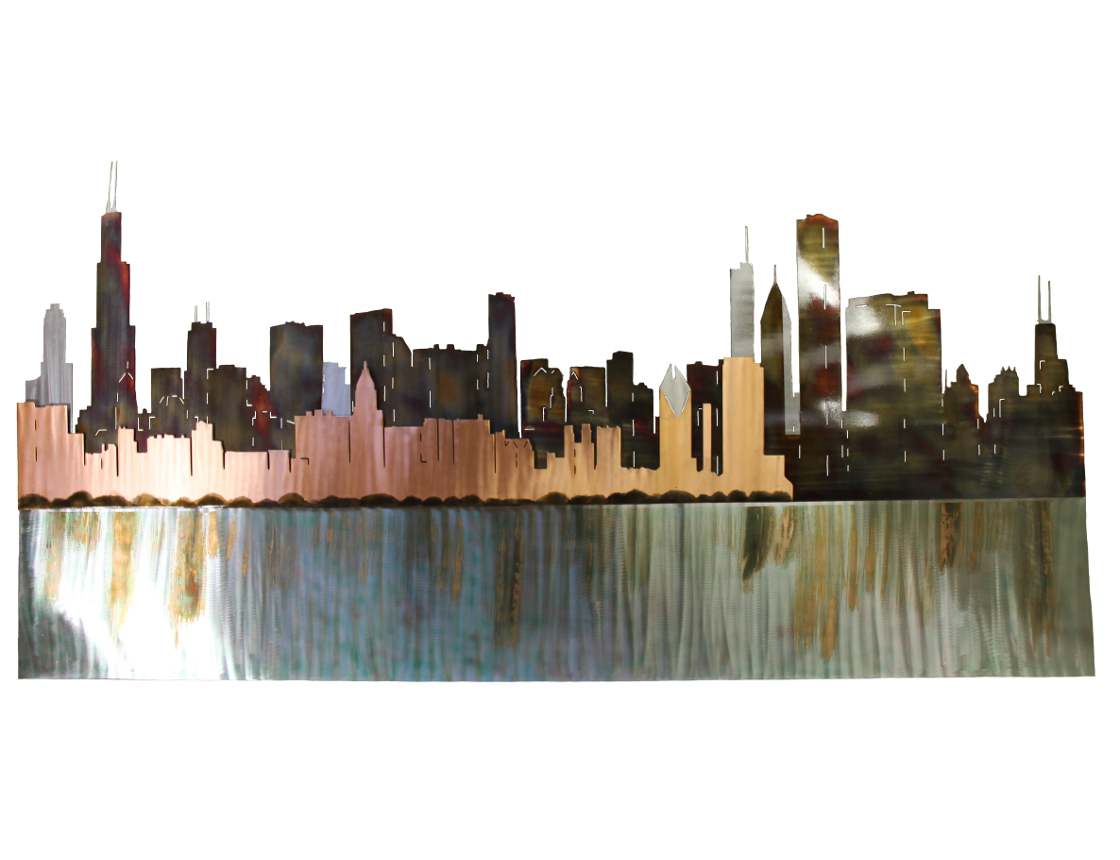
This post describes how we recently created a fairly large piece of Chicago skyline wall art for a client in Chicago.
Chicago Skyline Wall Art
A post written two weeks ago discusses the artistic process of creating the Chicago Skyline Metal Art for a Washington, DC couple two years ago. We thought that was a large piece! Creating it and shipping it proved to be challenging for us early in our career. However challenging, we survived.
A little over a month ago, Dan contacted us about the Chicago Skyline. He owns a brownstone in downtown Chicago and wanted to create the skyline for a large wall on his rooftop patio. Could we create it at 9 feet long? The answer to that question – no. But, we could create it at 8 feet long. Our CNC plasma table is 4′ wide x 8′ long. At 9 feet long, shipping could also be cost prohibitive. The total width x length would exceed FedEx girth limits for ground shipping. The only option would be freight at that size.
After considering possible options, Mike came up with a solution. The piece would be cut in four pieces and assembled using bolts through the pieces. Dan also wanted the skyline to hang on a grid already installed on his patio. So, Mike planned to weld hangers in an exact pattern to match the grid.
Assembling the Skyline
Once the skyline was cut and ground, Mike welded on all the hangers and bolts on the back. To test the theory, Mike assembled the piece to ensure property fit. We took photos to document the end result.
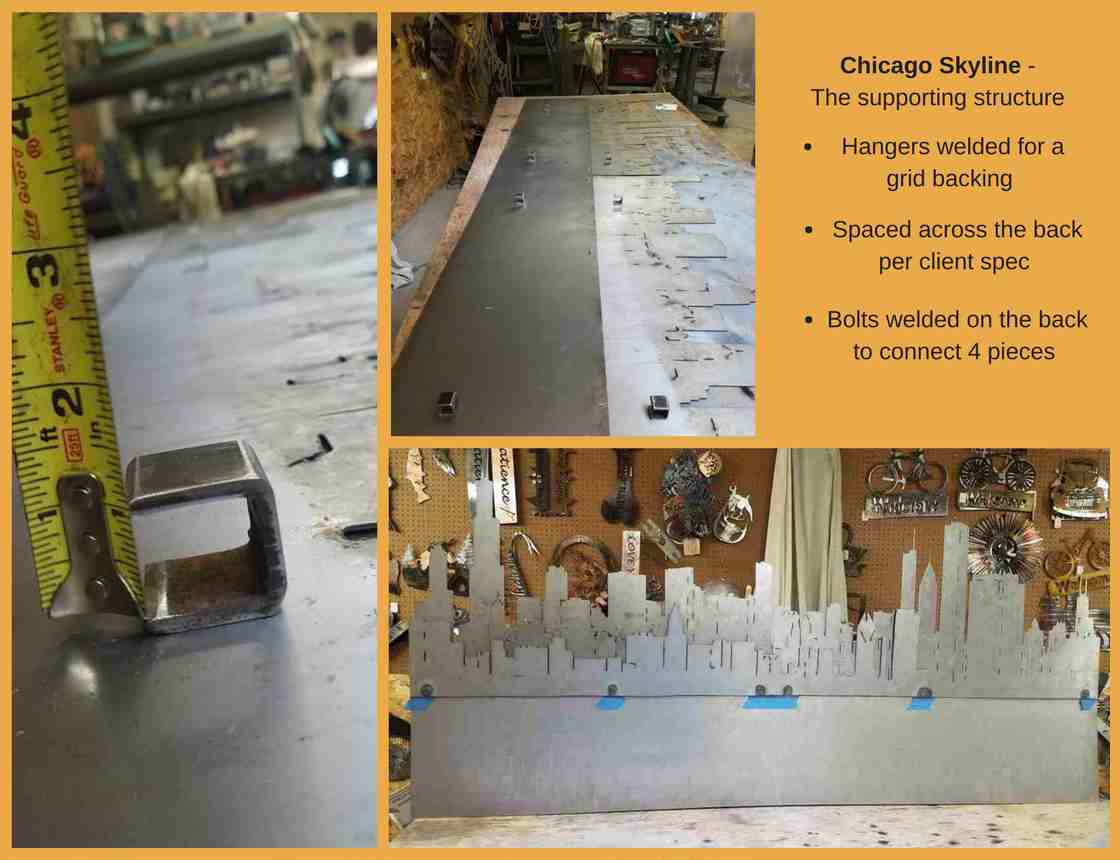
The back hangers and bolts for the Chicago skyline.
Final Construction and Instruction
Documenting how to assemble the skyline took center stage while finishing the pieces. Now that we knew how to assemble the piece, Mike could finish grinding and applying patinas to the skyline. The four pieces that make up the skyline include:
- The water, which served as the base for the piece and had holes drilled across the top.
- The back left group of buildings, attached to the water (bottom piece) with holes drilled across the bottom.
- The back right group of buildings, which had two holes drilled across the bottom and a bolt to go through the water.
- The front group of buildings, which had bolts welded to the back and would be inserted through the three pieces.
Confused? Mike spent a considerable amount of time coming up with how to connect everything together and maintain integrity of the skyline. It all went together, as you can see below.
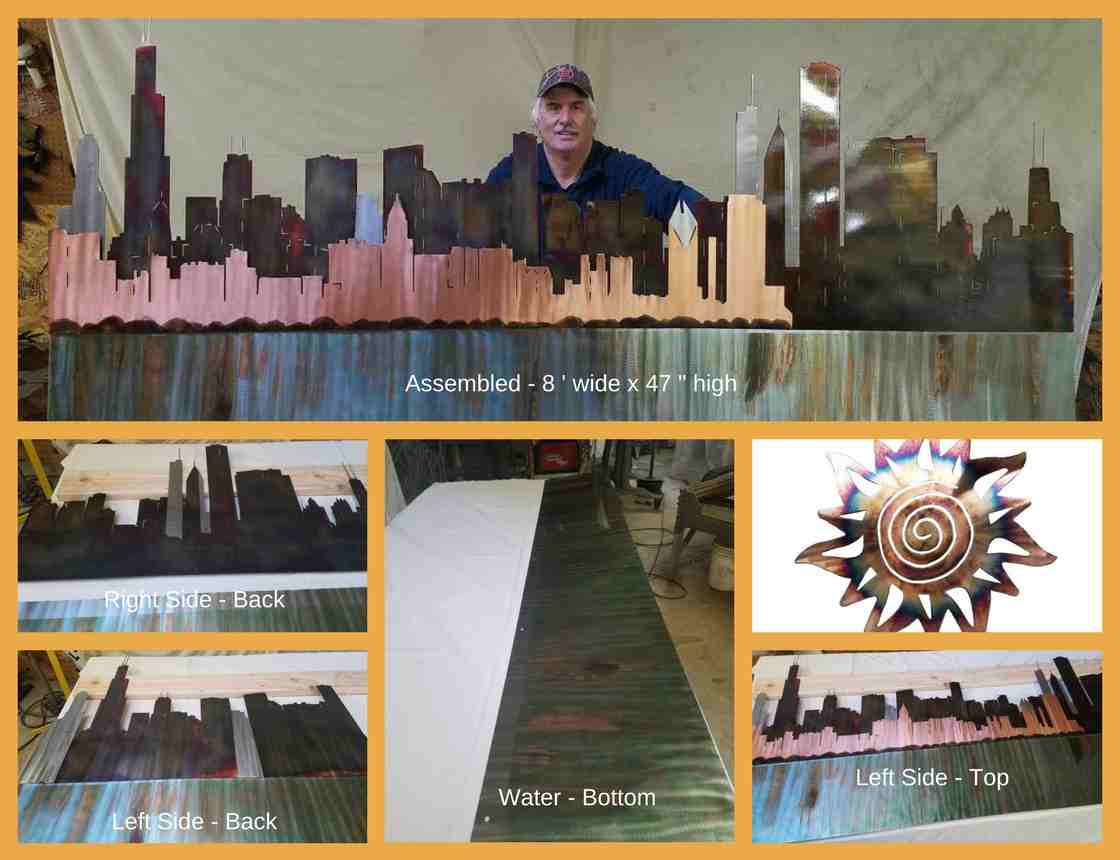
How to assemble a Chicago Skyline.
Throw in a little sunshine, and you have the complete picture!
And Out The Door It Goes
We shipped the completed and disassembled Chicago Skyline wall art last Friday. It took Mike two hours to package it up and make 3 boxes. We use rigid foam board to pack around each piece. That along with bubble wrap, more cardboard, and shrink wrap makes for a secure package. Most of our shipments go through FedEx. They haven’t let us down yet!
A major project to be sure! Five weeks from initial contact to shipping. We can’t wait to hear that it arrived at its’ destination safe and sound!