It’s a beautiful morning in Central Oregon, and I’m sitting on the back deck having my iced latte after doing a little Birding by Ear in Bend this morning. Having procrastinated about writing this blog post, I am now ready to try to capture the creative process we go through when working with our customers. It’s difficult to describe the process because each time you go through it, it’s different. So I’ll pick one example of how we created the custom metal wall art of Elk Lake with Kyla for Noel and Jill.
Creating Custom Metal Wall Art
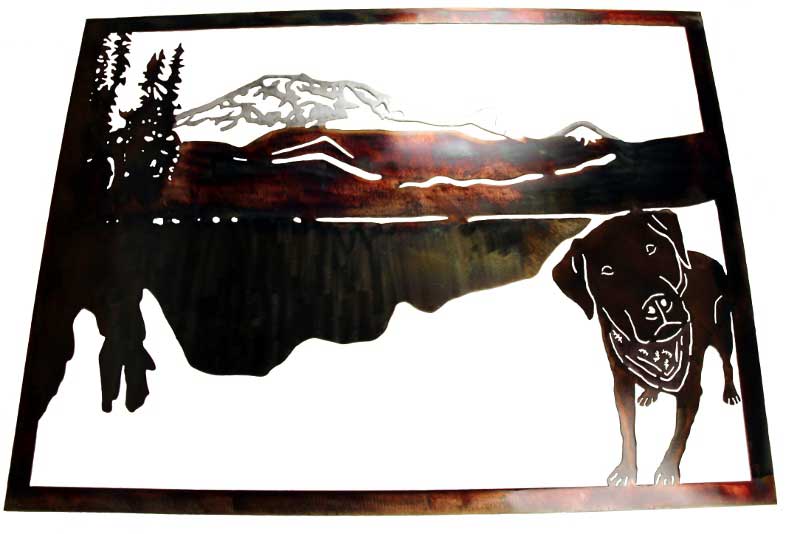
First, Noel and Jill contacted us after seeing some of our metal work in the local Sunriver shop, Wildflowers Consignment (no longer in business). They really liked our metal art and were just getting ready to move into their new house in the area. They were interested in having something made to hang above their headboard and asked what we could create for them.
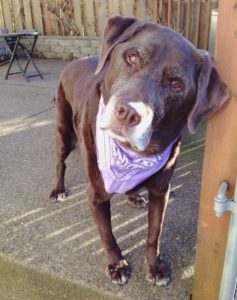
Creating custom metal wall art or signs is an iterative process which could take hours or days. So, we told Noel and Jill to think about a favorite place or thing that would put a smile on their face, would bring back fond memories, or make them think of a special occasion. It’s very personal and totally subjective. They mentioned that they really love Elk Lake and somehow wanted to incorporate their aging labrador, Kyla, in the finished piece. They would send pictures to us as a starting point.
Starting With JPEG Images
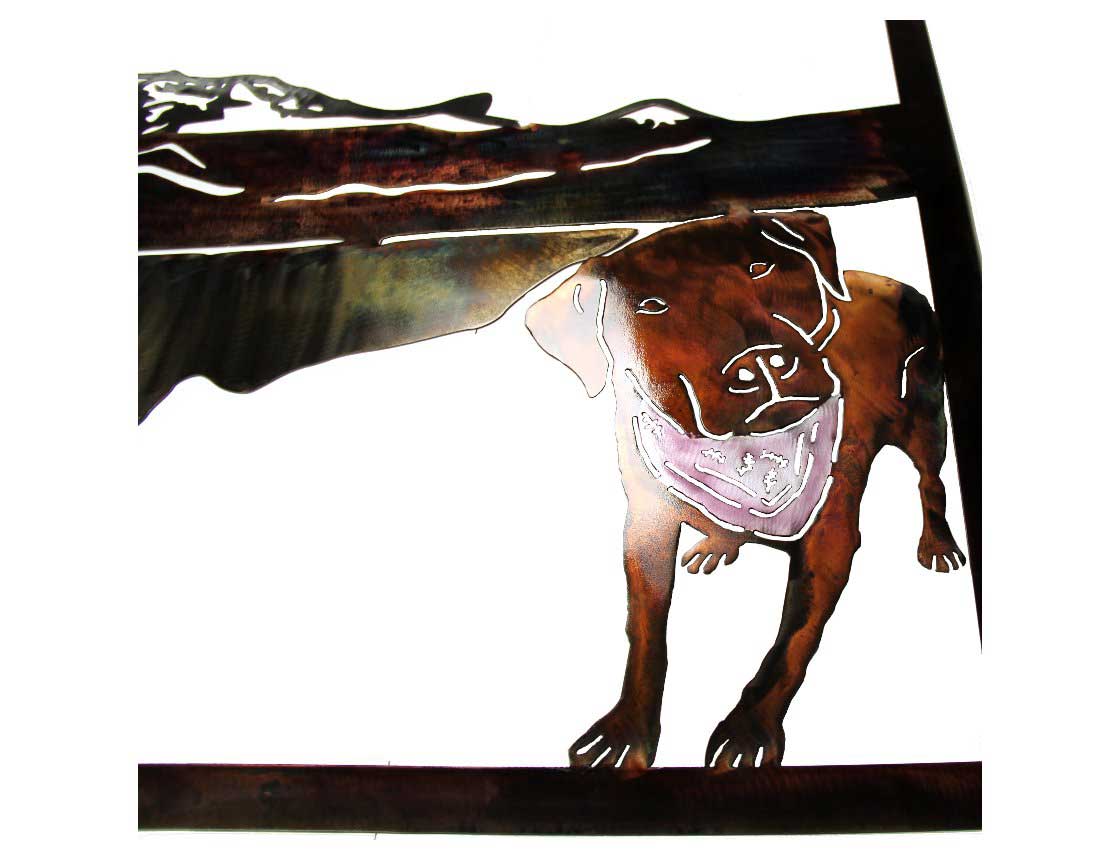
We used the jpeg image of Elk Lake as the starting point and then looked at how Kyla could be fit into the picture. Initially, Mike designed the prototype with Kyla’s face in the corner of the frame. After exchanging emails about possible changes, Mike used the whole image of Kyla and “flipped it”. That’s where the artistry part of the process enters – what looks right composition-wise to us. The client may decide they prefer a different look, but it’s easier to have a starting point to react to. Noel and Jill liked that alteration and decided on a final size.
The Elk Lake image sets the starting point for the shape of the piece, but having an idea of whether you are looking at 3 foot wide or 4 foot wide helps us determine the width and height of the piece. In this case, they decided to go with a 4 foot wide finished size. Elk Lake and Kyla helped determine the final height.
Creating The Design
After manipulating images in a software program called GIMP, we use Inkscape to bring the pieces together and create the vectored image. That vectored file is used by the CNC machine to plot where the image will be cut on the sheet of steel and control the process of cutting.
Cutting, Grinding, Welding, and Finishing
Once the piece has been cut out, Mike grinds it. Often, we will send pictures of different patinas we use to help the client decide on colors. Frequently, they give a general idea of colors and defer to Mike for the final patina application. Before we apply patinas, we weld picture hangers on. An automotive clear coat is then used to seal the piece to prevent rust.
Our Favorite Thing
We really enjoy custom work the most. Working with someone to take an idea and make it a reality is a special process. So, it’s rewarding to see the look on someone’s face when they see the finished piece for the first time. Photographs don’t do the patinas justice. The depth of color is really difficult to capture digitally. We are continually trying to improve that process!
Finally, here’s the result of the process just described. Noel and Jill were very pleased with their custom metal wall art. We have done more custom work for them. And, several of the items will become products for future shows. Jill and Noel wanted a couple of decor switches designed for their house, which we created and posted on our Facebook page. They have also become friends through the process, which is one of the side benefits of working locally!


